Frame-Off vs. Frame-On Restoration
The choice between a frame-off and frame-on restoration determines the scope, cost, timeline, and ultimate quality of your project. Understanding the difference before you start prevents mid-project scope creep — the number-one budget killer in classic car restoration.
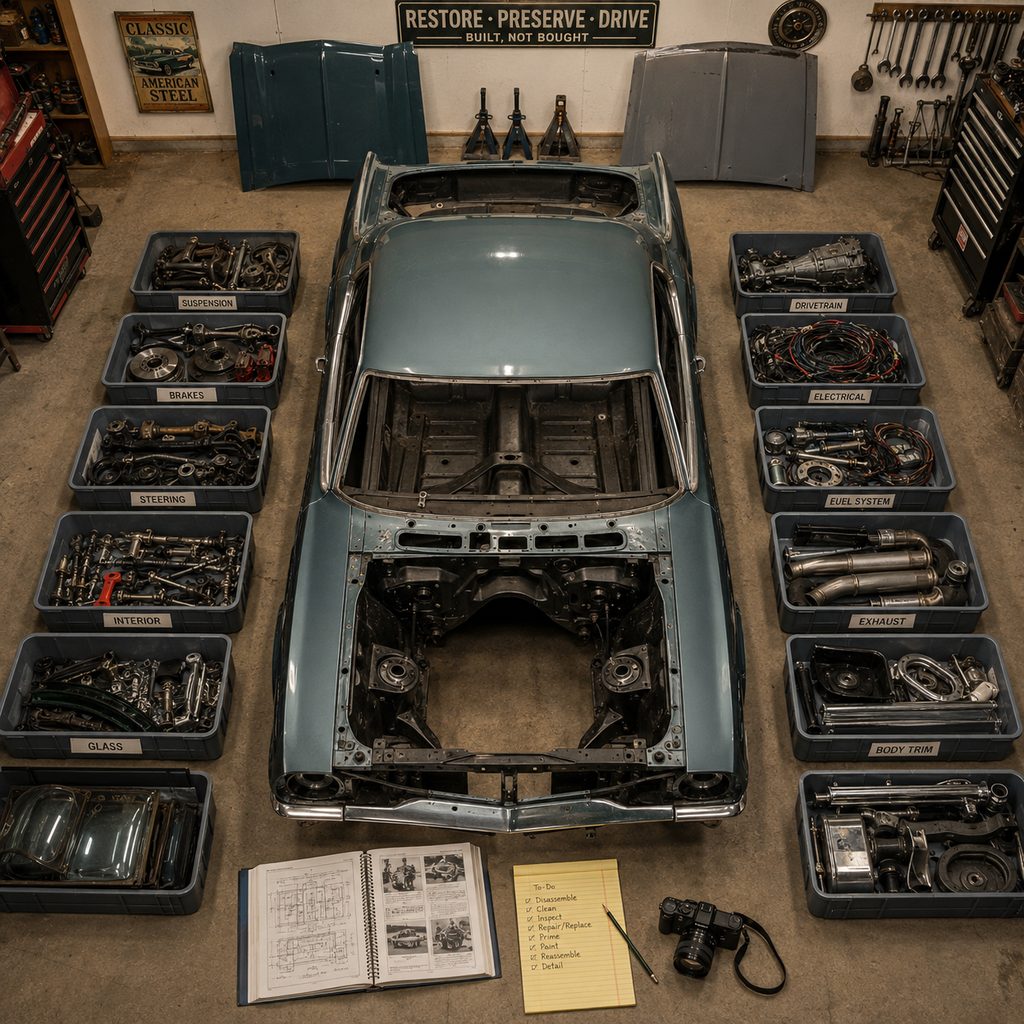
A frame-off restoration involves completely disassembling the car down to the bare frame (or unibody shell), stripping, inspecting, repairing, and refinishing every individual component before reassembly. This is the gold standard for show cars and concours competition, but it's also the most expensive and time-consuming approach — typically 1,000 to 2,000+ hours of labor for a complete car.
A frame-on restoration addresses systems individually without removing the body from the frame. You rebuild the engine in place (or pull just the engine), replace sheet metal as needed, redo the interior, and handle paint and body work with the car assembled. This approach is faster, less expensive, and perfectly appropriate for driver-quality restorations.
Documentation Before Disassembly
The single most important step before removing the first bolt is documentation. Photograph everything — every wire routing path, every hose connection, every bracket orientation, every fastener location. Take hundreds of photos. You will reference them constantly during reassembly, and the $0 cost of digital photos is infinitely cheaper than the hours you'll spend trying to remember where a bracket goes.
Label everything. Masking tape and a Sharpie are your best friends. Tag each wire, hose, and fastener with its location. Bag small parts with their mounting hardware and label the bag. Use a consistent system: "LF" for left front, "RR" for right rear, "ENG-ALT" for the engine alternator bracket, etc.
Buy the factory service manual before you start. Not a Haynes or Chilton — the actual factory service manual (or a faithful reproduction). These contain the assembly procedures that were used on the production line, with torque specifications, wiring diagrams, and component locations that aftermarket manuals often omit or simplify.
Rust Assessment
Rust is the fundamental go/no-go factor for any classic car project. Surface rust is cosmetic. Scale rust has begun consuming metal but hasn't penetrated. Through-rust means the metal has holes — structural compromise that requires panel replacement.
Common Rust Areas
Check these areas first, as they'll tell you the overall condition of the car: floor pans (especially under the carpet and sound deadener), trunk floor (around the spare tire well), lower quarter panels (the bottom 6 inches), rocker panels (both inner and outer), cowl area (where the windshield meets the firewall), and the area around rear leaf spring mounts or subframe connectors. Don't forget to inspect inside frame rails — a car can look solid from outside while the frame rails are Swiss cheese.
Treating vs. Replacing
Surface rust and light scale can be treated with media blasting (soda blast for thin panels, sand blast for frames and heavy components) followed by a rust encapsulator like POR-15 or Eastwood Rust Encapsulator. Once rust has penetrated through the metal, the only proper repair is cutting out the affected area and welding in new metal — either a reproduction patch panel or hand-fabricated steel.
Paint Preparation
Paint preparation is where most amateur restorations fall short. A $10,000 paint job on poorly prepared surfaces will look worse than a $2,000 paint job on properly prepared metal.
The correct sequence is: strip to bare metal (chemical strip, media blast, or DA sanding) → treat any remaining rust → apply epoxy primer (a moisture barrier, not a filler) → apply body filler where needed and block-sand → apply high-build primer surfacer → wet-sand to 400–600 grit → apply sealer → basecoat → clearcoat. Skipping steps — especially the epoxy primer moisture barrier — leads to adhesion failure, peeling, and rust-through within months.
Sourcing Parts: NOS, Reproduction, and Used
NOS (New Old Stock)
Original parts manufactured during the car's production era but never installed. NOS parts are the holy grail for concours restorations because they're factory-correct in every dimension, finish, and material. They're also increasingly rare and expensive. eBay is the primary marketplace for NOS parts, along with swap meets and specialized dealers.
Reproduction
Newly manufactured parts made to original specifications. Quality ranges dramatically by manufacturer — companies like Dynacorn (sheet metal), Year One (trim and accessories), Classic Industries, and OER have established reputations for accuracy. Always research the manufacturer before buying, especially for structural components like floor pans and subframe connectors where fit tolerance is critical.
Used / Good Take-Off
Salvaged parts from donor cars. Often the most cost-effective source for components that don't wear (brackets, hard trim, structural pieces). eBay, swap meets, and Facebook Marketplace groups dedicated to specific marques are the best sources. Always inspect photos carefully and ask about the condition of mounting hardware and mating surfaces.
VIN Decoding
Your car's Vehicle Identification Number tells you everything the factory specified: model year, assembly plant, body style, engine code, trim code, and production sequence. For GM cars, the VIN is typically found on the dash (visible through the windshield), on the driver's door jamb, and stamped into the frame. Ford used a similar system with an additional body buck tag. Mopar cars carry a fender tag with detailed option codes.
Decoding your VIN before ordering parts ensures you're sourcing components correct for your exact application. A 1969 Camaro with a 307 small-block uses different motor mounts, exhaust manifolds, and accessory brackets than a 1969 Camaro with a 396 big-block — the VIN tells you which you have.
Budget Planning
The universal rule of restoration budgeting: take your estimate and double it. This isn't pessimism — it's based on the reality that hidden problems always surface once disassembly begins. The floor pans that looked solid from above reveal rust-through underneath. The "rebuilt" engine needs machine work. The "complete" interior is missing clips and fasteners that cost $5 each but add up to hundreds.
Budget in phases: mechanical (engine, transmission, brakes, suspension) → structural (floor pans, frame, subframe) → cosmetic (body, paint, chrome) → interior (seats, carpet, dash, headliner) → electrical (harness, lighting, gauges) → final assembly and detail. Complete the car in this order even if you're tempted to jump to paint — a beautiful car that doesn't stop or steer is a dangerous car.